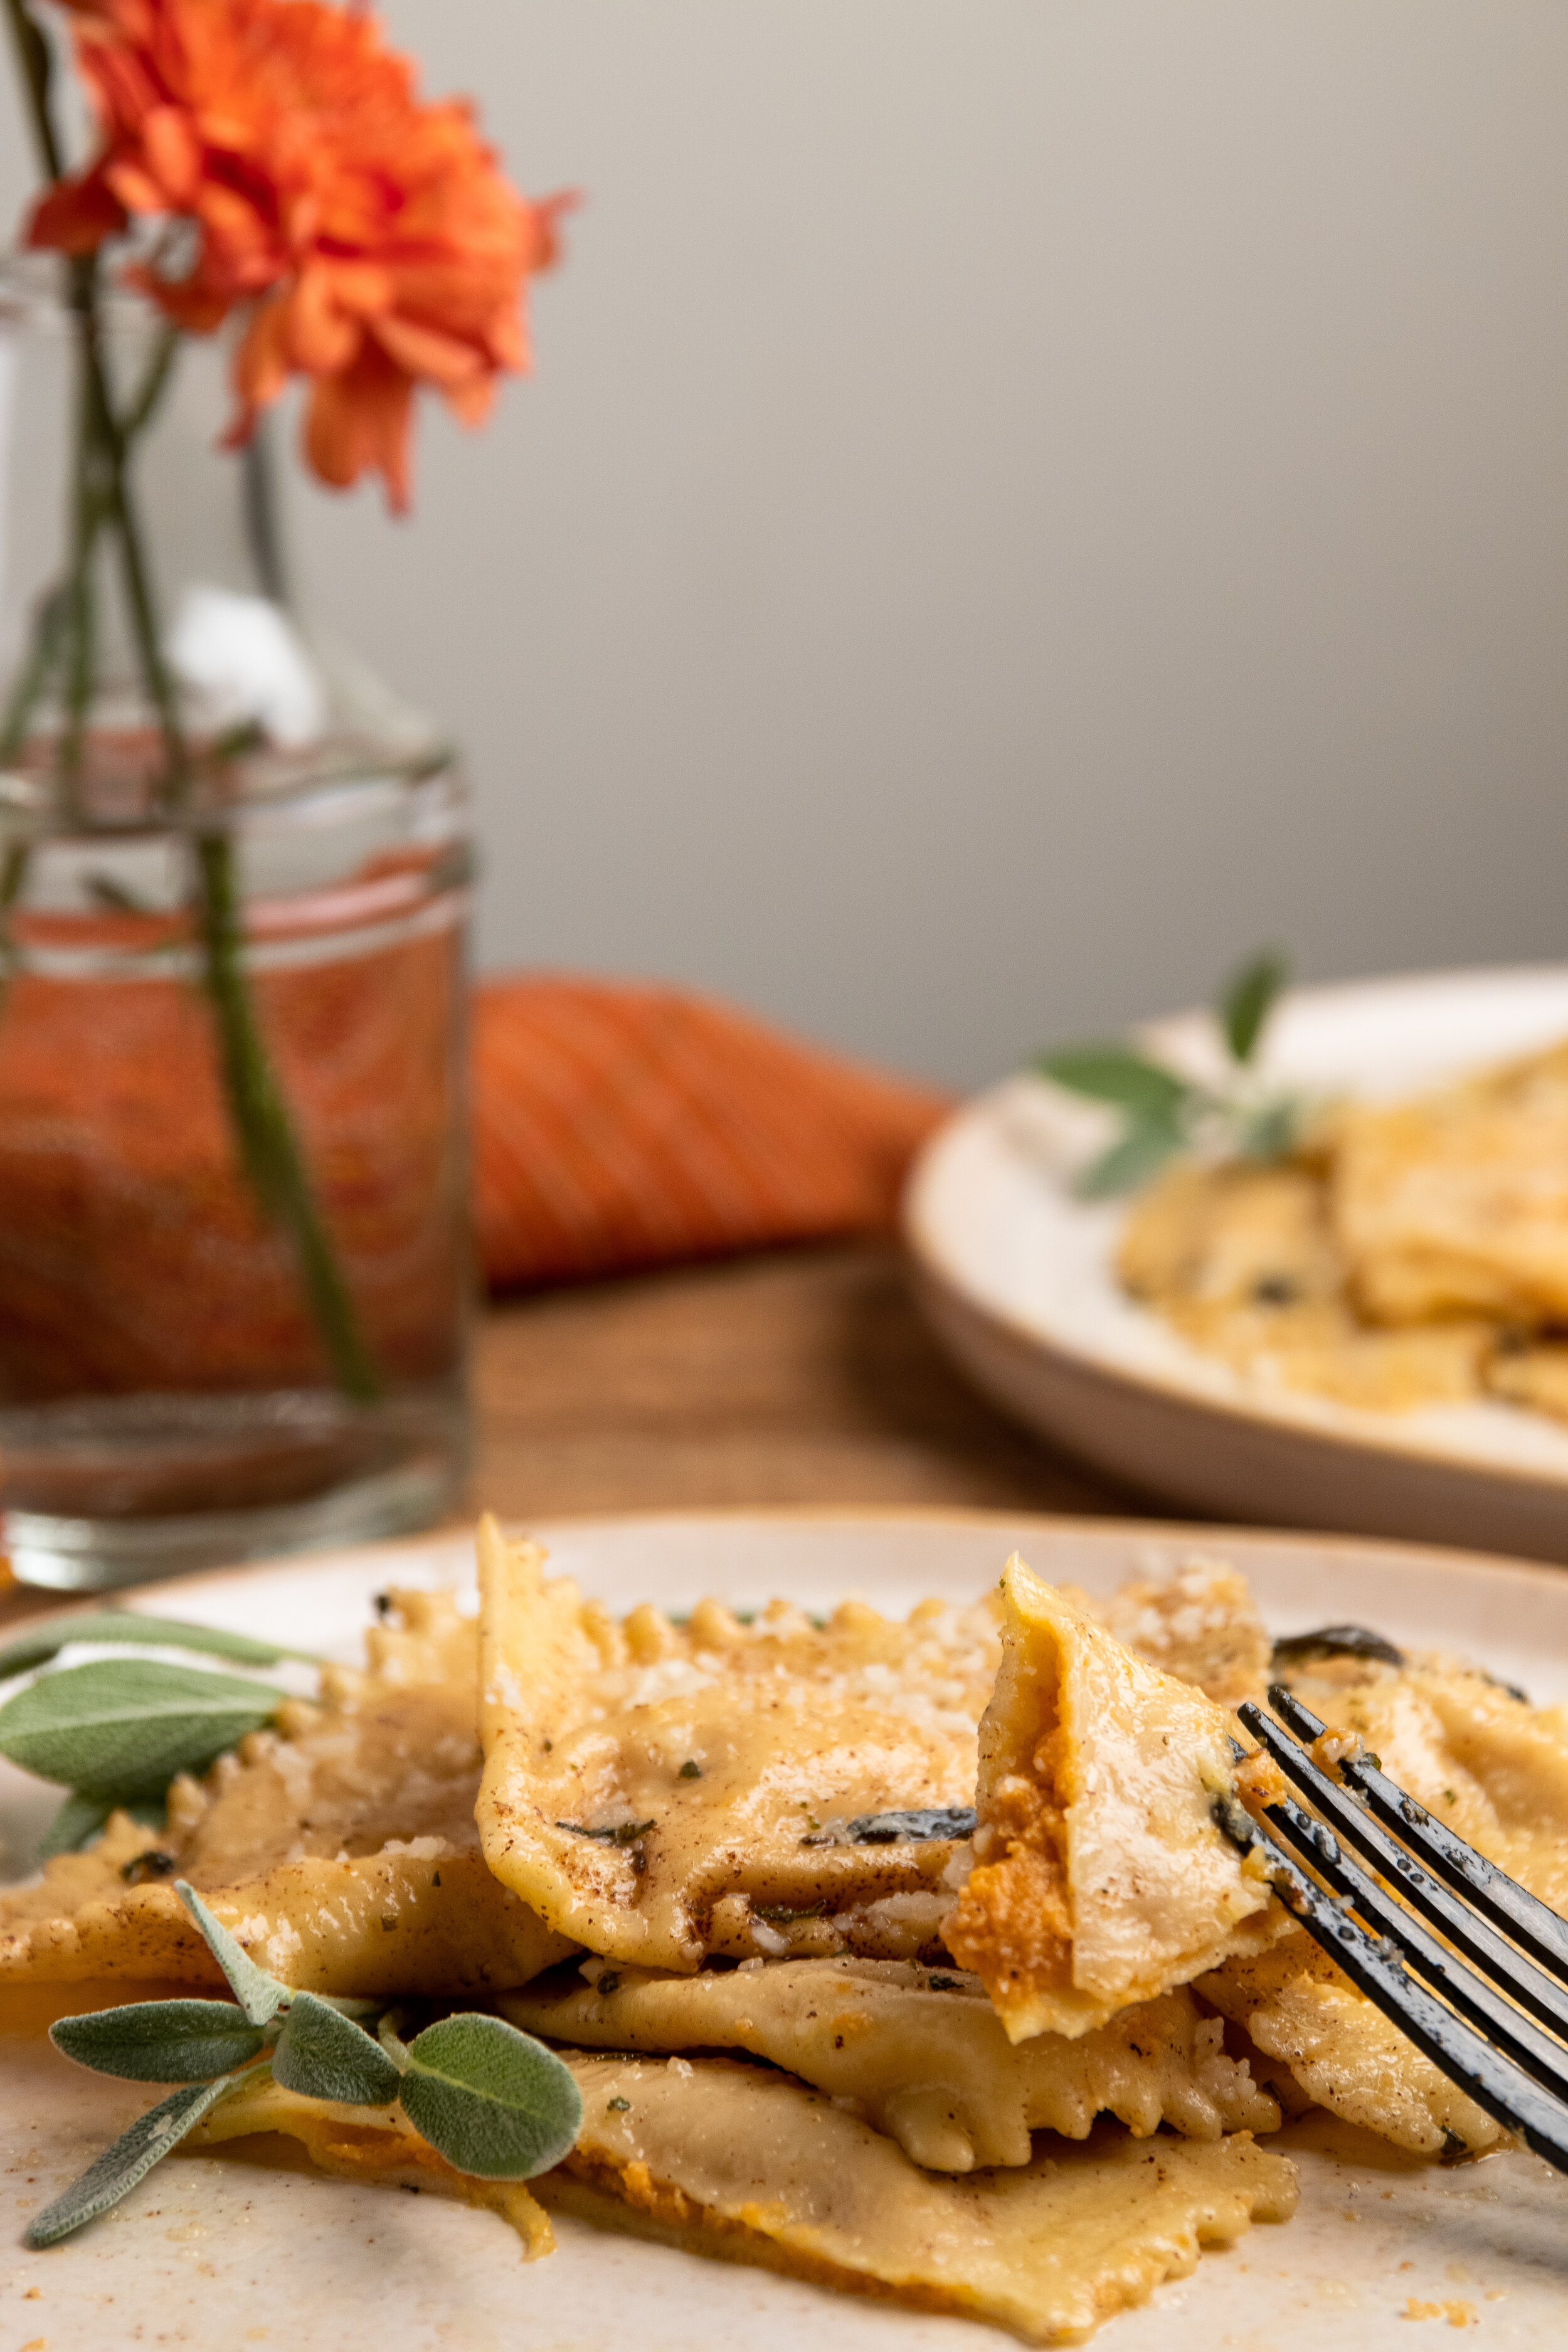
Homemade Pumpkin Ravioli with Brown Butter and Sage
Happy Almost Halloween!
To celebrate the season, I’m sharing my recipe for homemade Pumpkin Ravioli. A savory take on pumpkin, paired with cheese, a hint of nutmeg, and a rich brown butter sage sauce. Nutty, earthy, just the right amount of pumpkin, enveloped in pasta that can’t get any more fresh.
Apparently when I was a little kid, on a trip to Italy, whenever I saw Pumpkin Ravioli on the menu, I had to order it. At five years old. It was a memory I was reminded of only recently when I had the idea to make these guys. I still can’t fully wrap my head around that memory. Weird. As I’ve gotten older, just barely able to look back at my childhood, I’ve come to embrace the concept that some traits in little kids aren’t that far off from their adult selves. Little chef then, not so little chef now. It feels like I’ve changed so much but then again some things never change.
Making the Dough
On a clean surface, form the flour into a pile and make a well in the center. Crack your eggs into the center of the well and use a fork to break up the yolk. Alternatively, whisk the eggs beforehand and pour the eggs into the center of the flour.
As you are whisking, begin to move the fork towards the inner edges of the well, gently bringing in more flour. Allow the flour to incorporate before continuing the process and adding more to the eggs. Repeat the process until the majority of the ingredients are combined.
If not all of the flour is combined, or more likely your dough is a big shaggy mess, don’t worry! That’s what it should look like at this point. This is when you’ll want to start kneading your dough and all of the stray pieces.


Kneading the dough:
Method 1:
This is the method that I always use. Once I get into the rhythm of kneading, the movements become second nature. Essentially a cycle of pushing the dough away and pulling it back towards the center.
Using the heel of your hand, push the further half of the dough away from yourself. You’ll see a little “tail” of dough form where you stretched the dough with your hand, sort of a more flat triangle shape. Fold the tail back in the center of the dough, towards yourself, and use the heel of your hand to firmly push it into the center. Rotate the dough roughly 45 degrees and repeat the process.
Method 2:
This is the method my dad uses when kneading pasta dough. Once you finish kneading, you are left with a nice little log shape that is all set to be rolled out.
Roll the dough into a log by placing both hands towards the center of the dough. Move each hand away from the center, stretching outwards and rocking your fingers forwards and backwards. Fold the outer thirds of the log back into the center and repeat the process.
Homemade Pasta Dough
A couple of things to keep in mind when making your dough:
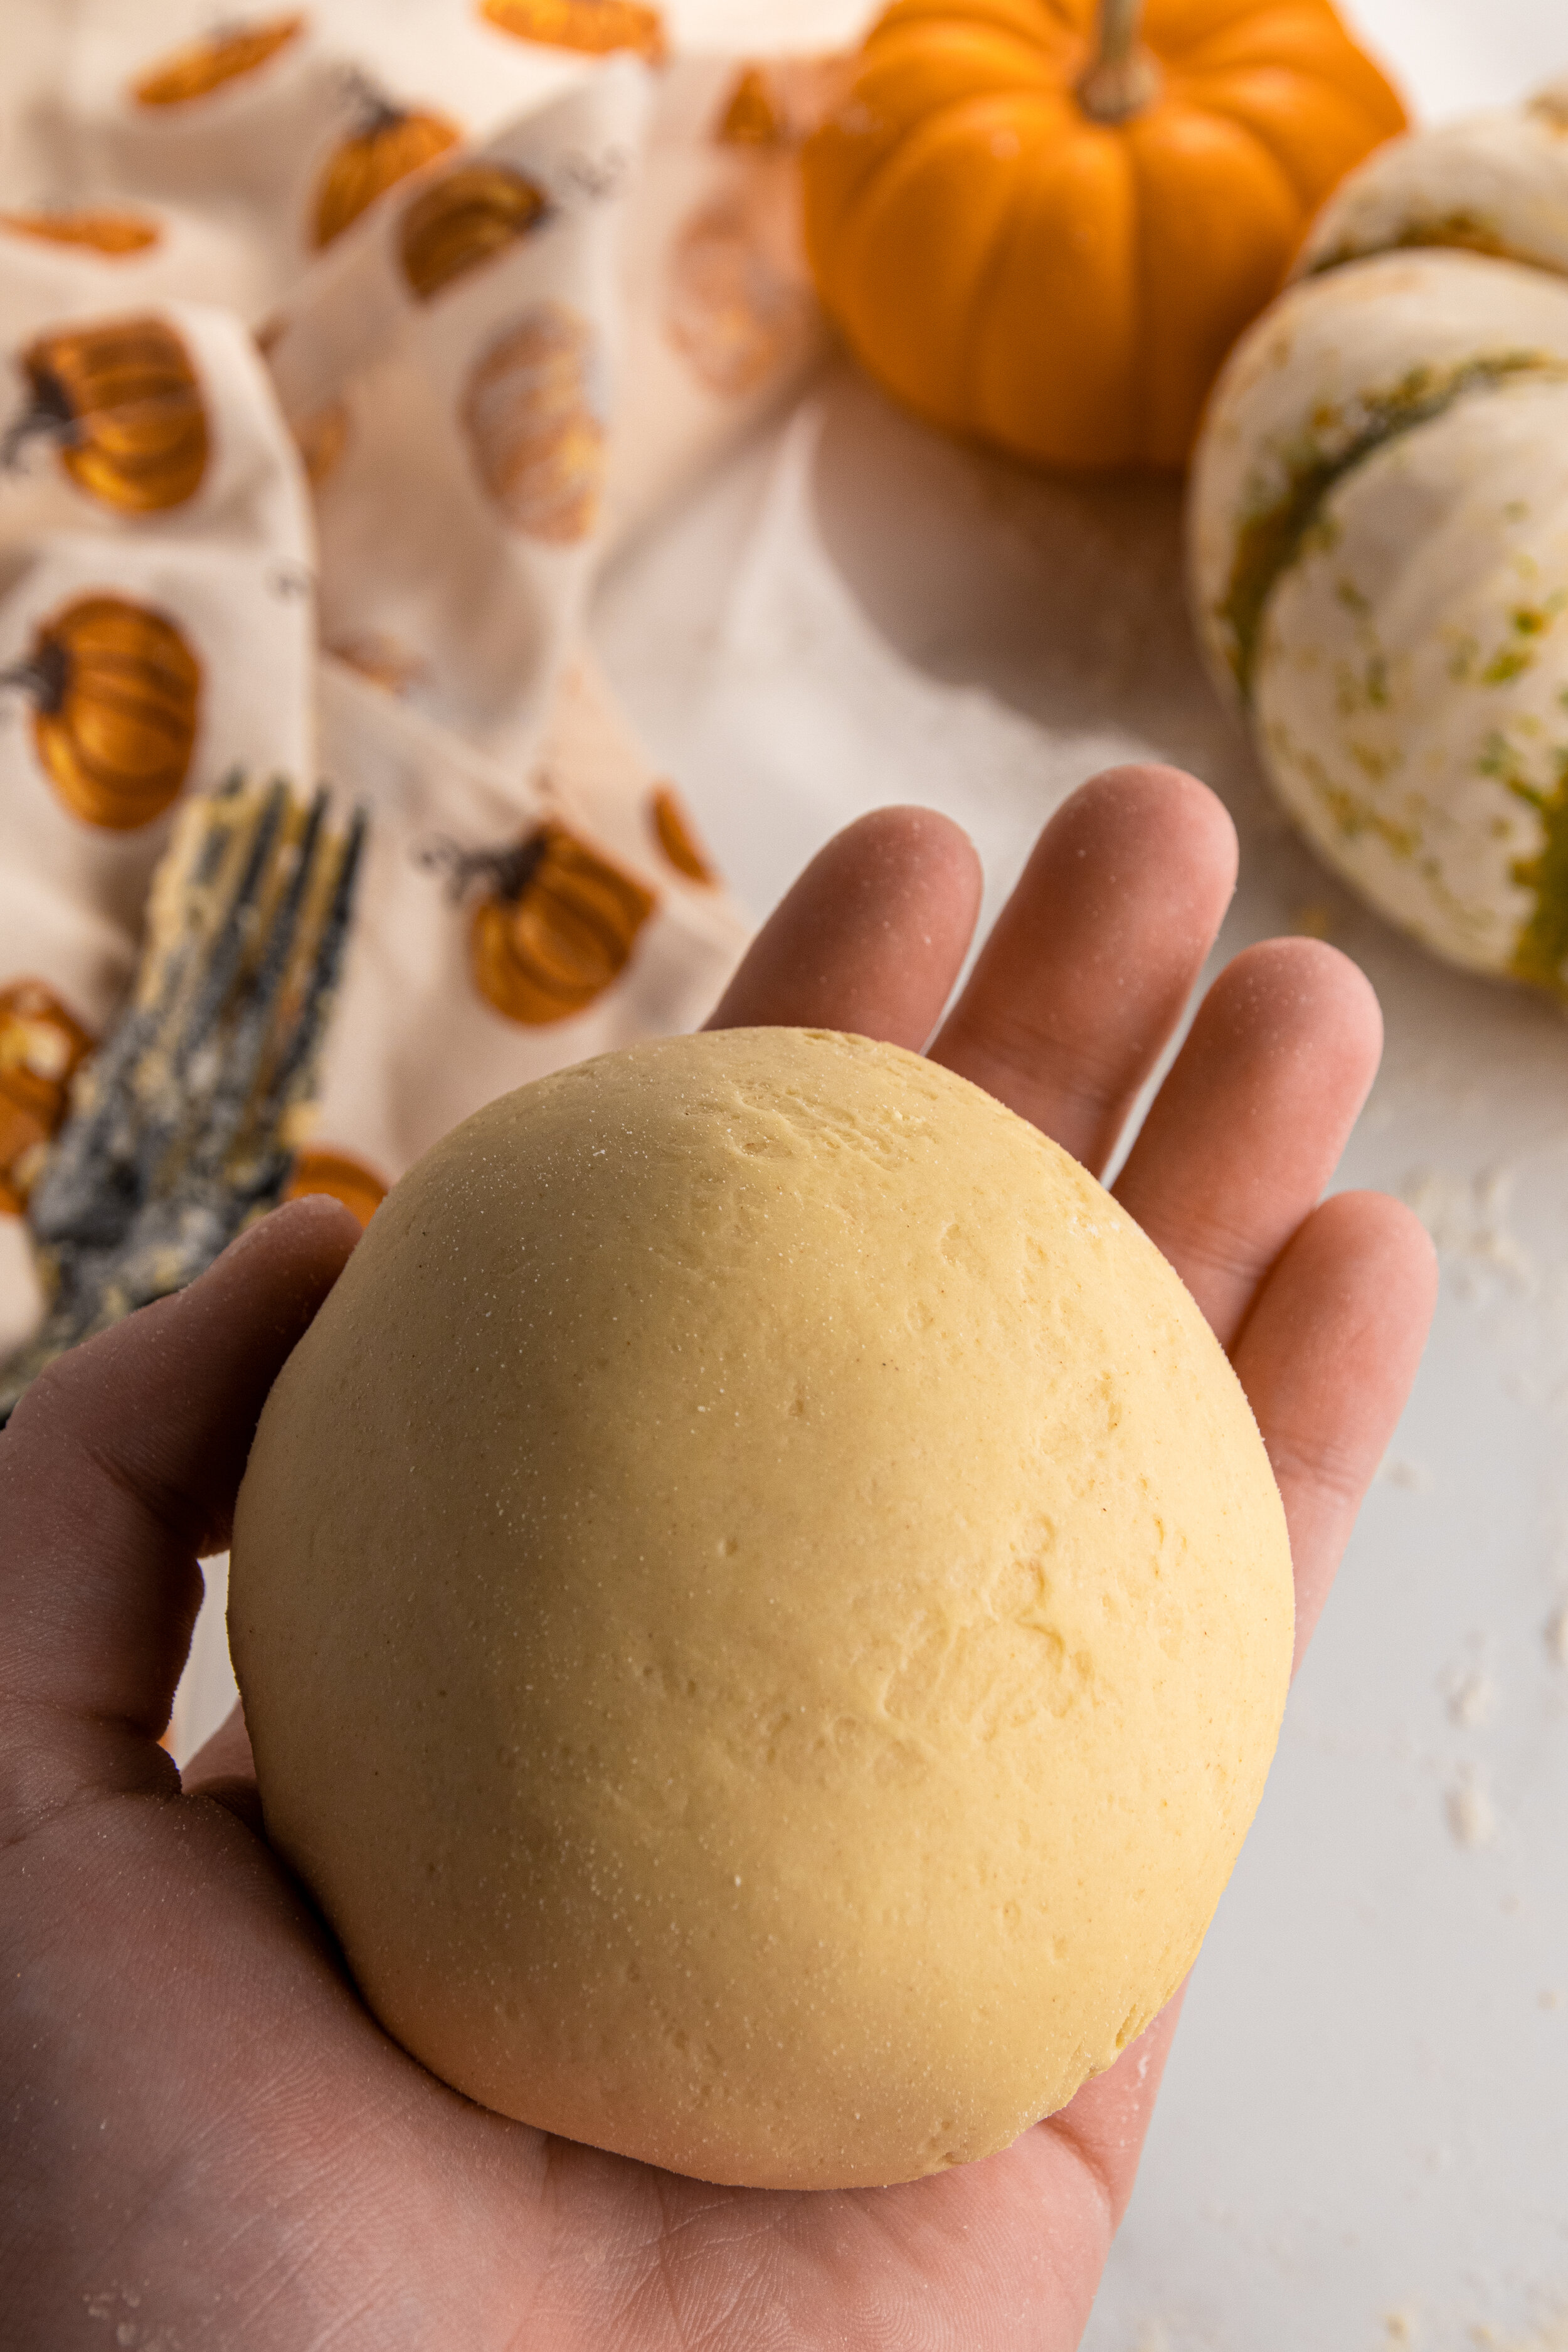
Pasta dough has everything to do with feel. Altitude, humidity, even the size of your eggs effects your dough, which makes every batch of pasta unique. Pasta dough in autumn will not be the same as pasta in the spring. The heat of your hands, the moisture in the air, a particularly windy day - pasta does not adhere to strict guidelines that recipes set in place. I try not to fixate too much on the measurements, but instead focus on the texture and moisture of the dough. If it feels a bit sticky, add a little more flour to the work surface.
Go with the rhythm, adjust flour as you go, and look for texture. Once the dough is stretchy, workable, and silky, you’re good to go! Wrap in plastic wrap and let rest in the refrigerator until you are ready to roll out the pasta.
Take away every urge to stick firmly to technical aspects of recipes. Let your instincts - and hands - guide the process.

Rolling out pasta dough
Rolling Out the Dough
Whether you have a fancy attachment or a hand cranked pasta maker, there are a few things to note when rolling out dough. Have a towel laid out for the pasta sheets so they have a place to rest and don’t dry out. Keep a knife or pasta cutter on hand to halve lengthy pasta sheets. Besides that, have fun!
Step 1
Step 2
Step 3
Filling the Ravioli
Last few steps!
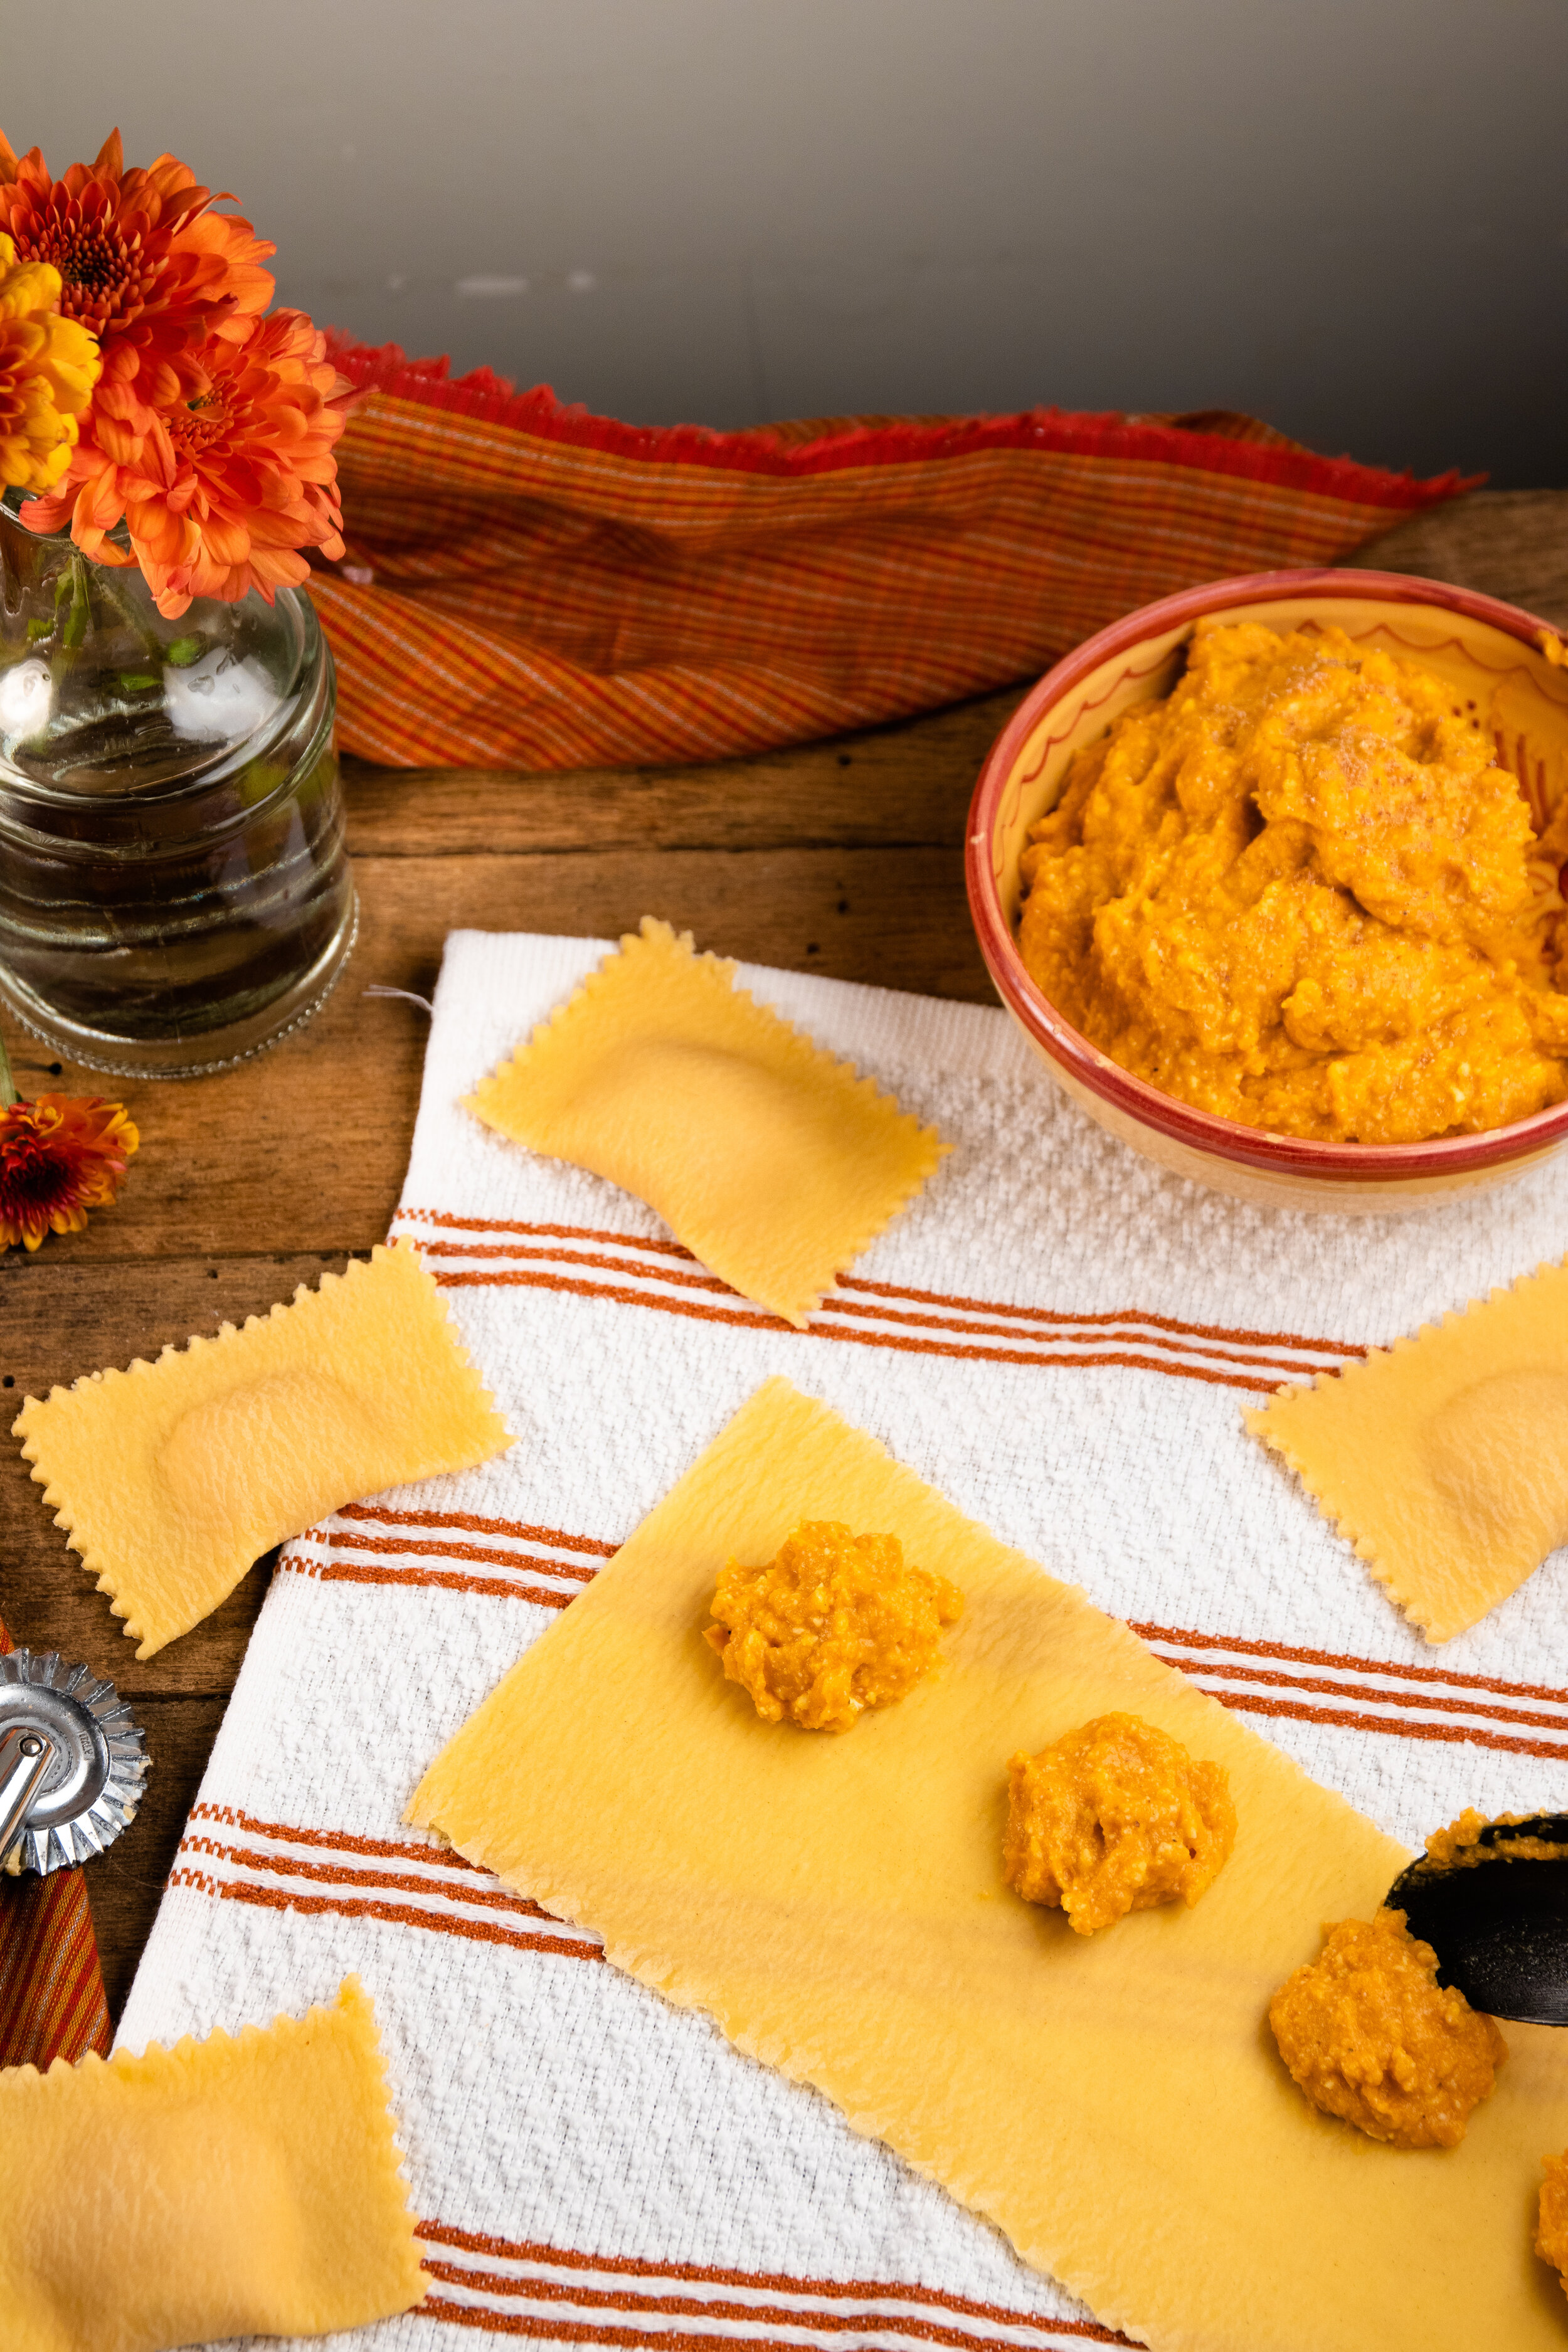
Lay out a sheet of pasta and spoon about a teaspoon of filling on one half of the dough. Continue down the sheet, leaving about an inch between each spoonful. Using your finger, brush a light line of water in between each spoonful and down the edges of the dough on either side.
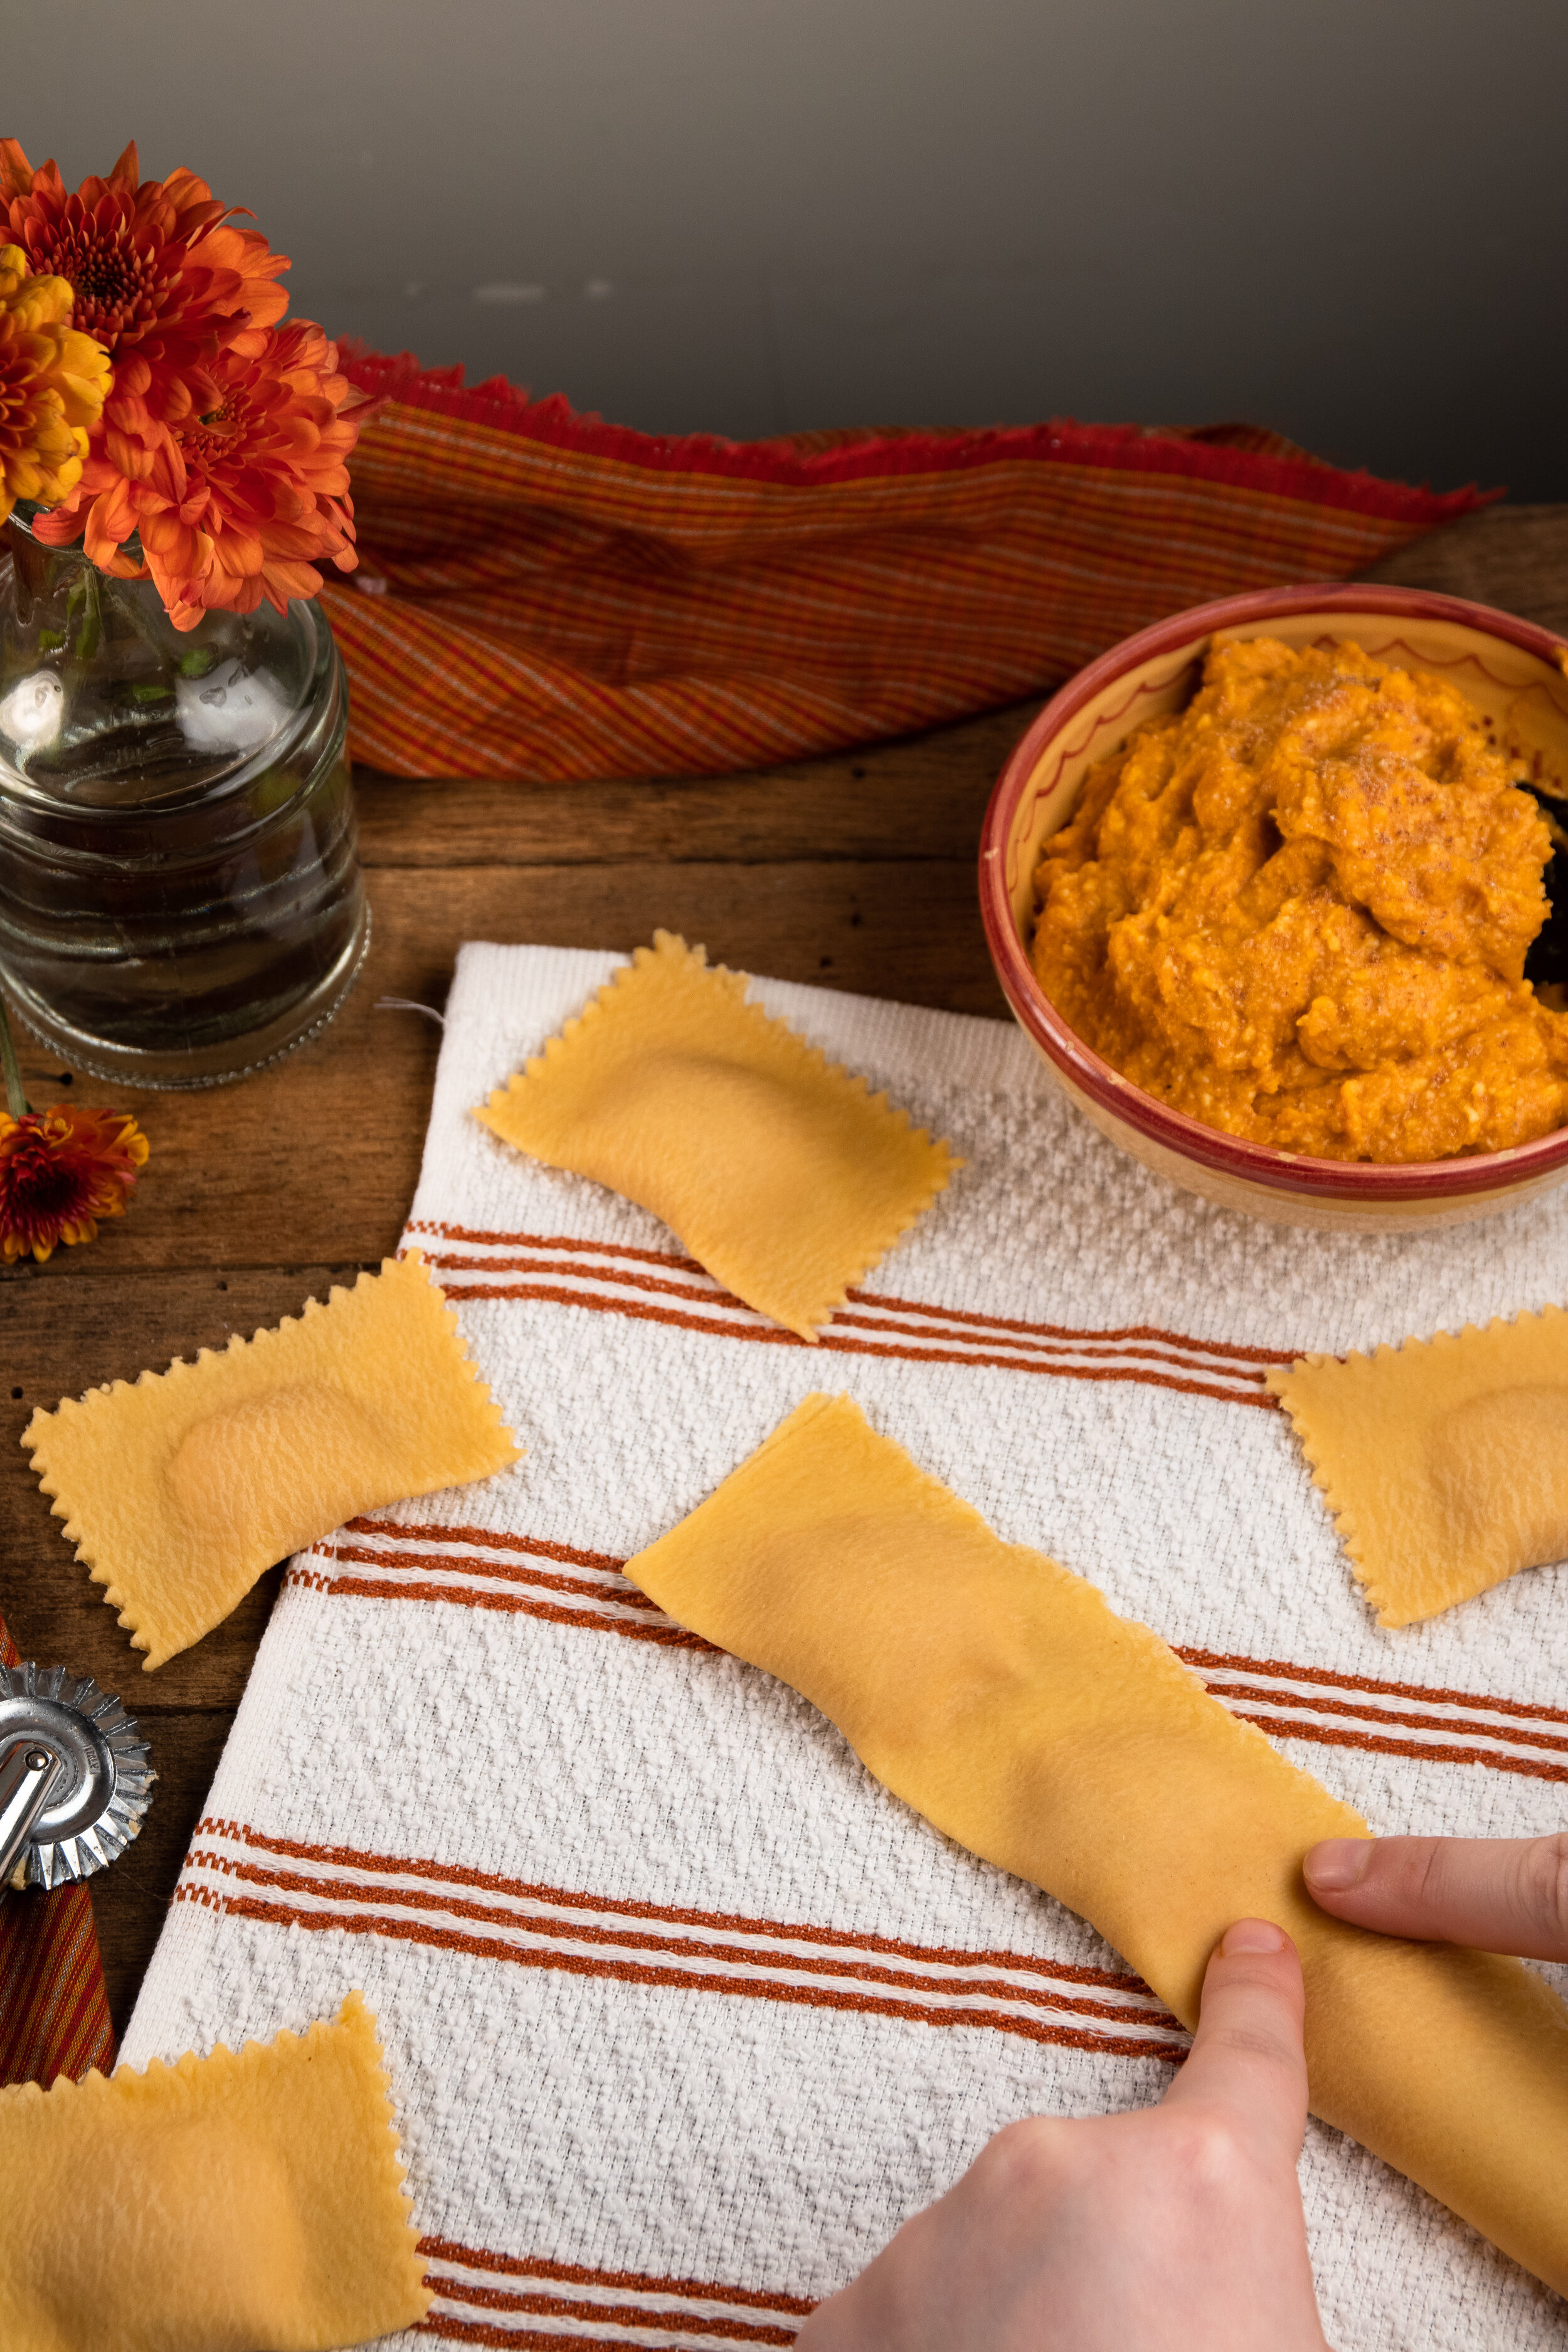
Carefully, fold the dough over the top of the filling, but do not seal the seams. First, use your fingers to press out any air from between the ravioli and seal the space between each spoonful of filling. Then, press out any remaining air from the remaining seam by gently feeling around the filling. Once all the air is out, press together the final long edge.
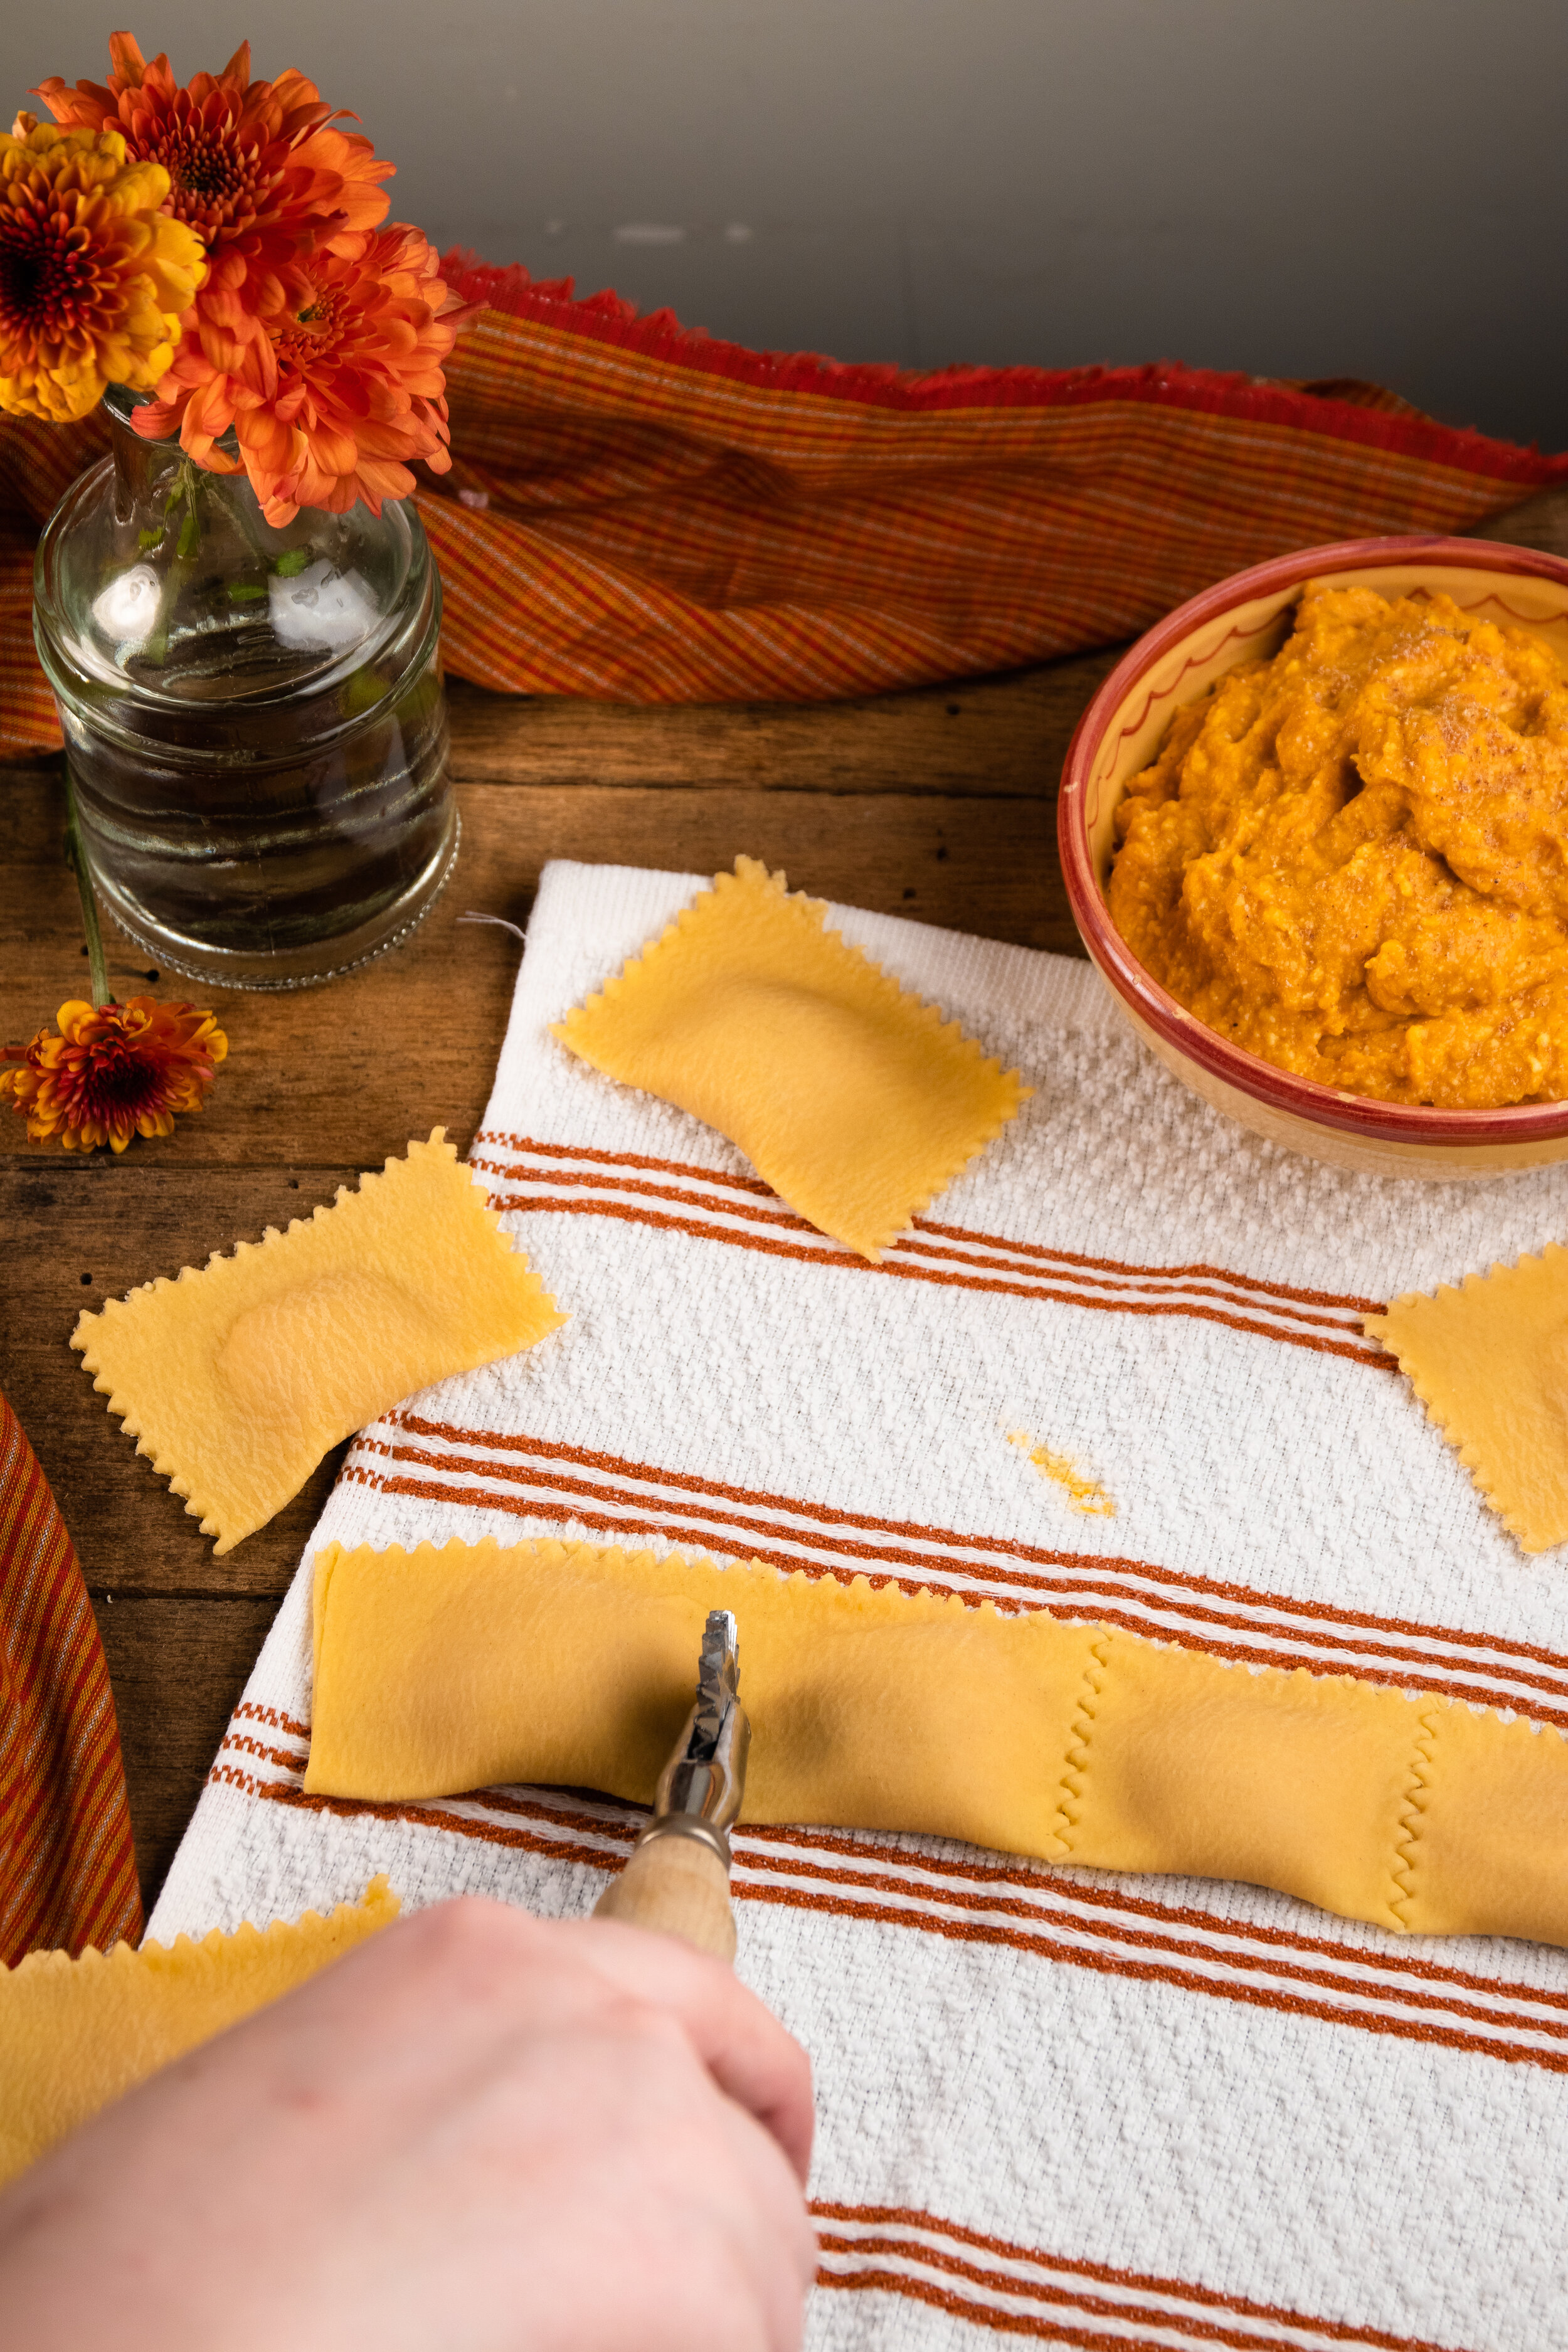
Cut your ravioli! Using a knife or a pasta cutter, cut the ravioli into their individual pillows. If you’d like, trim the long edge for a more uniform look. Just be careful not to cut along the folded side.
From there, bring a large pot of salted water to a boil, cook your ravioli, and finish off with some simple, yummy brown butter and sage sauce.
Before I jumped into making my dough, I sat down to read some wise words from Marcella Hazan. It had been a while since I’d made pasta by hand, and I wanted to reorient myself before starting. Marcella’s Essentials of Classic Italian Cooking is genuinely my handbook for Italian food. She writes pages upon pages about different pasta shapes, the process of rolling out dough, hand forming different shapes - there’s so much there to soak in, and just as much to learn by doing. Each part just as enjoyable. As I’m writing this, I’m becoming more and more aware of how difficult it is to explain something that can’t fully be put into words. Some elements seem too instinctual, too case by case to really put pen to paper. There’s so much to be said about a dish that can inspire pages of writing, made from two ingredients: flour and eggs. Beautifully simple, unique to each creator.
Today, I think many are of the mindset that newer equals better. That highly researched methods and newly developed ways must be the best ways. Or, on the flip side, that shortcuts produce the same results. That we can somehow fast track the process by cutting corners. We’re always looking for the next best thing. Not to say that any of these new or quick methods produce bad results. But that it’s difficult to mimic something done by hand. So if I am going to commit to making homemade pasta, I am going to take the time to treat it with care.
Maybe I’m just too stubborn and fiery to submit myself to new ways of pasta making.
Maybe I just like the heart and hands style of cooking that brings me back to earth, and don’t want to let go of these ways of cooking that have such deeply well-loved roots.
Homemade pasta is a rare meal, but the time put in is well worth it. Delicate, tender little pillows of pumpkin made by hand - another Halloween treat.

Homemade Pumpkin ravioli w/ brown butter and Sage
ingredients
Of course, this is Marcella Hazan’s recipe for yellow pasta dough from Essentials of Classic Italian Cooking.
For the Pasta Dough:
2 cup of unbleached all-purpose flour, plus more as needed
4 eggs
For the Filling:
3/4 cup pumpkin puree*
1/2 cup ricotta
1/4 cup grated parmesan
pinch of nutmeg
pinch of salt
pinch of pepper
*Be careful not to use pumpkin puree with seasoning.
For the Sauce:
4 tablespoons unsalted butter
a few sprigs of sage, roughly chopped
pinch of salt
method
The Pasta Dough
On a clean surface, form your flour into a pile and make a well in the center, wide enough to hold the eggs. Crack the eggs into the center of flour and begin to stir, breaking up the yolks and beating the eggs. Gradually, begin to bring some of the flour into the eggs, incorporating little by little as you go.
Once the majority of the flour is incorporated, or you can no long stir the eggs, you can begin kneading the dough. Repeat the process of stretching and pulling, adding more flour as needed if the dough is too sticky. Once the dough is stretchy, workable, and silky to the touch, it is ready.
Form into two logs and wrap in plastic wrap and refrigerate until you are ready to roll out the dough.
Making the Ravioli
Meanwhile, prepare your filling. Mix together the pumpkin puree, ricotta*, parmesan, nutmeg, salt, and pepper.
*Some types of ricotta can be dry and not easily mixed. If your ricotta is creamy, mixing will work great. If you have a less creamy ricotta, transfer the filling to a food processor and pulse a few times for a smooth, creamy filling.
Prepare your work area by laying out a couple of towels to rest the dough, setting up your pasta maker, and having a knife or pasta cutter nearby. For stuffing ravioli, set out your pumpkin filling and a small bowl of water.
On the lowest setting on the pasta maker, draw the dough through while cranking at a consistent pace. Continue bringing the dough through the pasta maker, moving the setting up to gradually thin the dough. Once the dough forms a long thin sheet, it may become too difficult to work with, so I usually cut the sheet in half, setting one half to the side while finishing with the other. I recommend doing this around the third or fourth notch. Continue until you reach the second highest setting on the pasta maker (6 for me, but may vary). Repeat for each sheet of dough.
Lay out a sheet of pasta, and cover the others to prevent them from drying out. Spoon about a teaspoon of filling on one half of the dough. Continue down the sheet, leaving about an inch between each spoonful. Using your finger, brush a light line of water in between each spoonful and down the edges of the dough on either side.
Carefully, fold the dough over the top of the filling, but do not seal the seams. First, use your fingers to press out any air from between the ravioli and seal the space between each spoonful of filling. Then, press out any remaining air from the remaining seam by gently feeling around the filling. Once all the air is out, press together the final long edge.
Using a knife or a pasta cutter, cut the ravioli into their individual pillows. If you’d like, trim the long edge for a more uniform look. Just be careful not to cut along the folded side. As you finish making the ravioli, spread over the towel, turning every so often as they start to dry.
Bring a large pot of salted water to a bowl. Cook for about 5 minutes, until the ravioli is tender and soft. Carefully strain and transfer to the brown butter sage sauce.
Brown Butter Sage Sauce
In a saucepan over low heat, melt the butter with the sage and salt. Once the butter is melted, raise the heat to medium, stirring constantly. Watch for small flecks of golden brown to appear in the butter, then turn off the heat. Continue stirring, as the butter will continue to brown in the hot pan.
Toss the cooked pumpkin ravioli in the brown butter sage sauce and enjoy!